Friday, December 9, 2011

Jars in Heels

I was trying to decide why I love apothecary jars and cake stands and I realized it has everything to do with my love of fashion and high heels. Don't get me wrong, I love a pair of ballet flats as much as the next girl, but there are times when you have to have a seriously killer pair of heels. It's like how mason jars are so warm, homey and can totally strike the right tone. For special occasions, however, your mason jars need some heels! Enter these totally easy jars. My friend Leanna, did some awhile back and I did some plain black, but thought they needed a Christmas makeover! You will need the following
Unfinished wooden candlesticks (in different heights if desired)
4x4 square or round plaques
3 inch wooden disks
jars (mine were 6 inches)
E-6000 glue
acrylic paint in base color and one metallic
sponge brush
butter knife

Before you paint your pieces you will need to either bend in or remove the metal shell in the candlestick. Sometimes they pop out and sometimes they won't budge, its fine either way as long as the metal is bent in and the top of your jar can sit evenly. Then go ahead and paint all your pieces (candlesticks, disks, plaques) and let them dry, it may take a couple of coats. I took a gold acrylic paint and dipped a paper towel in it and rubbed it all over, wiping it off as I went. It created a really subtle glazed look.
Then apply E-6000 to the bottom of your candlestick and place it in the middle of your plaque. Let it set for an hour, it may still move so be careful. The great thing about this glue if you haven't used it is that once it is set it is like cement! Then glue a disk to the top of your candlestick and finally add your jar. I flipped mine over and let them dry overnight.

I found the cute reindeer bells at Walmart and thought they would be cute toppers. I glued around the edge and centered them. You are done! My other jars were ones I had done for a church Christmas Party last week. I cut out cardboard stars and ripped some so the bumpy part showed and just painted them gold and silver. Then tied them with twine or ribbon. They were cheap and easy. I am now thinking of all the other things that would be cute on the top of these jars. . . .. . . and oh yeah. . . . . . the dollhouse is sort of an issue. . . . . . . . . . .

Tuesday, December 6, 2011

Faux Boot Socks

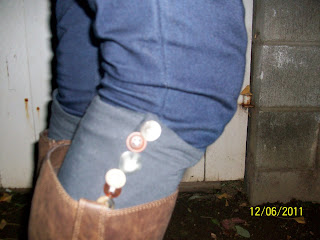
So I am so late posting this, but the flu made it's rounds at my house last week and nothing productive happened! I am finally posting my faux boot socks, please excuse my ghetto photography and also the Blair Witch-esque one at the bottom. I can't photograph my own legs real well and my husband doesn't get home until it's dark. I finally decided that it was better to post it with sort of lame pictures that not at all!
These are so so easy. I wanted to make sure that I didn't use a sewing machine at all because I know a lot of people don't have one or sometimes might not feel like getting it out. I used the above sweater, dress and jersey to make the 3 pairs below.

This was definitely the easiest. Cut the arms off of my old sweater dress, made some quick yarn bows, stitched them on and BAM! Super cute right??
I used the back of my sweater to make these and just measured my leg, cut them to the right width and put buttons on. Then I just stretched the gaps in the sweater until I could get the buttons through. I love how rustic and cozy they look.
These were probably the trickiest (still not hard), I measured the jersey, and then folded it over the same width as my widest button and then stitched the button on through both layers. I used all different shapes and sizes and the buttons are the only thing that is holding them together so make sure to sew them on well. I am loving how these are not really for warmth, it just is not that cold in Southern California.
These are a super easy, super quick project and I think they would be perfect for girlfriends. I am thinking that I will make them for our cute babysitters.
Sadly, I put the Vintage Press Flower on the back burner for now. There are just too many fun holiday things to do right now and the flower could really be for anytime. Up next is some fun holiday wall art, apothecary jars, and of course the dollhouse!! I have been tracking it and it is coming tomorrow, I seriously am so excited. Please remind me how excited I am when I start complaining about it!!

Sunday, November 27, 2011

The Whimsy Catcher

The Whimsy Catcher


So I know I said my next post was going to be tutorials but I got sidetracked (get used to it) by this. Since I started the blog last week my mind has been literally going crazy with ideas for projects and I have to write these things down or draw them or they are gone. I knew that the perfect place to do that would have been my teal notebook. It is kind of where the inspiration behind "The Whimsy Diaries" was born. I bought this notebook on clearance at Target probably 4 years ago and it is one of my most prized possessions. I love pinterest and I love my iphone but I sometimes need something that is completely from my own brain to the paper. This book has a crazy mix of things from recipes jotted down from a friend to Christmas lists for my kids to sketches of something I want to make. As I looked back through this book, I realized it's probably the closest I will ever get to journaling. But it's full. Enter Black Friday, and Michael's sketch books were on sale buy one get on free!! I thought it was the perfect solution and after pulling out all of my fabric scraps, throwing a piece of scrapbooking paper on the cover with modge podge, this is what I came up with.
I basically just cut a wide strip of heavier fabric, hemmed it and attached little strips with a flap for a pocket for my pencils and to keep the book closed when I am not using it. I also used stamps to stamp my initial on a piece of fabric. So I am calling it "The Whimsy Catcher" and it will catch all of the stray thoughts coming out of my brain! I am excited to use it and keep all of my ideas organized (well, we can hope right?). I always have random bits of time waiting for a therapy appt. or to pick someone up from school and I know exactly how I will be spending those!!
Wow, it is kind of disturbing how happy a book full of blank paper can make me. I guess I should be more understanding when my kids have stolen all the printer paper. . . . . . . . .

Friday, November 25, 2011

New Tutorials Coming soon!

Hey Friends,
Right now I only have 3 followers but I am a firm believer in quality not quantity! I have a couple of fun tutorials coming up and wanted to give a heads-up to anyone who would like to have some of the supplies on hand before so that they are ready to go. Sometimes I see a tutorial when it is too late for me to go out and get supplies and I really want to start it that night so this is for all my fellow OCD crafters!

Vintage Press Flower-
1/4 yrd of muslin
scrapbooking stamps and ink in any color (I recommend navy, brown, black, dark red, mainly more muted tones)
needle and thread
felt
hot glue
buttons
headband, belt, clip, broach pin, whatever you might want to attach this too!

The high boot socks are a new major love of mine since they are basically leg warmers and who doesn't love leg warmers??
Faux High Boot socks
Jersey or any stretchy material
Old sweaters that you don't mind cutting up
lace, ribbon, buttons etc. be creative!
a sewing machine would be good, but this project can be done without one!

And last but not least..... Drumroll please...... I have ordered an unfinished dollhouse for my 6 year old (Londyn) for Christmas and will be documenting the process of turning this into a seriously cool crib! I wanted to post this in time for anyone else who would like to order one and trade ideas and tips during the process!!
Anyway, I think this is PLENTY to keep me busy for the next little while so I am off to bed. Black Friday was exhausting!!

Monday, November 21, 2011

The Posh Pumpkin


The Posh Pumpkin


I am so excited to share one of my favorite projects with the followers and girls here at Simple Simon. I am new to blogging, writing tutorials and using the computer for something other than online shopping and pinterest, so this should be interesting! These pumpkins are perfect for teacher and neighbors and make a spectacular centerpiece.

You will need
As many pumpkins as you want (I like real but fake is totally an option)
1 can each of gold, silver and bronze spray paint
a tarp or trash bag to paint on
3 fall leaves per pumpkin (not too crumbly)
1 bottle each of acrylic paint in silver, gold and bronze (or any metallic)
1 package fresh cranberries
1 package pearl pins


I was in a hurry as usual so I just laid out my paper towel and paint and used a sponge brush to paint my leaves. You really can't mess this up! Mix your colors and coat your leaves as much as you want.

Now comes my favorite- spray paint. It is seriously a good thing I had very strict parents because I really could have had a great graffiti career. These do not have to be perfect or even, you want them to have variation and depth.
Next, you attach the leaves by pushing the pearl pins through the cranberries. Make sure to avoid using the squishy cranberries. Use the really hard ones. You can even scatter cranberries with pins all around your pumpkins or in clusters. I didn't because I had to transport these to 3 different schools and they are more fragile with cranberries all around.


Thanks for letting me share and Happy Thanksgiving!!!